Woodblock Printing of Generative Art
Experiments with laser cutter, generative art, and traditional printmaking.
I’m fascinated by dithering algorithms and generative art generally. I have also started with traditional printmaking last year. I wanted to connect these activities somehow. I especially liked the idea that printing by hand adds a unique layer of randomness and noise to the process. Halftones are print basics anyway, so this connection is obvious. So how to get bitmap dithering (halftones) from computer to paper with relief print?

Digital images
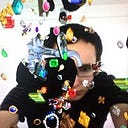
For print, I use my generative artworks, which are based on long photo sequences and videos. I used RCNN and OpenCV to mask selected objects out of the video (or image sequence). These masked objects (like people, cars, etc.) were separated from the background and further manipulated, so they create “time chains” — traces of objects in time. Each object is also converted to black and white dither, with many random modifications determined by time. This was done using my OpenFrameworks script, so I could play with the dither more “manually”.
Anyway, If you are interested in print only, you can use Photoshop or Gimp to convert photos to black and white raster bitmap.

Photopolymer relief printing
I was researching various techniques and I first decided to try photopolymer plates. Some of them could be used for relief printing, which better suits my needs. I used a Toyobo Printight Solar Plate. I won’t get into much detail, but the process requires many steps like correct exposure of the plate, washing with water, drying, exposure again, etc. As a result, I got good relief printing plates with my motives. I used them like linocut for relief print with a water-based color. It works, but this process is demanding in terms of time, sunshine, and also the plates are not cheap. The outcome is a bit of a surprise.


Woodblock Printing With the Laser Cutter
So I was looking for some other technique, without the need to wait for the sunlight and also work without chemical smells. Laser Cut seemed like an option — and it works well in the end. It is quick and cheaper than photopolymer plates and the result is almost the same in my case. I used 4 mm thick poplar plywood.


Experiments with the print resolution
I have created a test plate, to have an idea, what are the smallest possible dots and lines, which are possible to use. I came to a minimum of 0.3 mm for the dots and 0.2 mm for lines. Smaller shapes are not reliable. The laser should remove at least about 0.2 mm of material so the ink stays on the surface.
Print file (tiff or pdf) has to be negative in black and white. Black parts are burned away and whites remain as a relief.


Printing from the Woodblock
This step is easy and most enjoyable. I use Sláma Press (slamapress.com) — it is small to fit in the bookshelf but you can make large format prints with it. The process is similar to lino printing. I have used water-based color, so the plates could be cleaned easily and used many times.